Friday 28 August 2015

DIY— Cake Stands for Yummy Cakes and Cupcakes

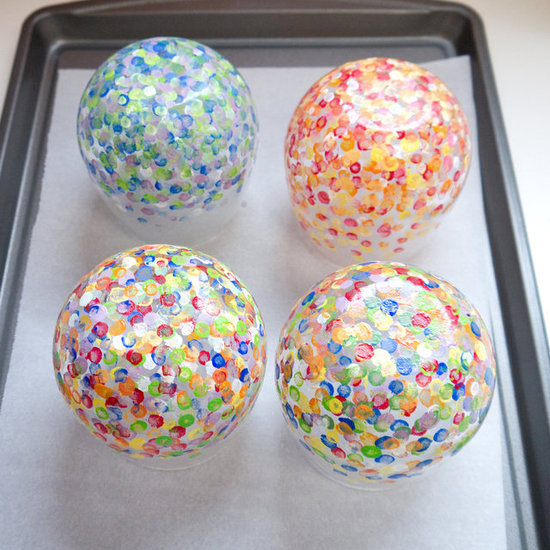
You hear the word ‘cake,’ and the term ‘Yum’ is pretty instantaneous as a reply that comes out of your mouth. The whole thing about cakes and confectionaries is pretty dramatically appealing and manages to elate anyone, regardless of age to go a little berserk to have them all.

Well, if you are a fan of yummy cakes and good decorations around, then you might want to give making beautiful cake/cupcake stands a try yourself!

So in this week, we are going to tell you how you can create beautiful cake stands for some yummy and savoring cakes.

Things you will need

- Old microwave plates

- Candle stands

- Pie dishes

- Spray paint

- Glue

  1. Take a candle stand and on top of it attach one of the old microwave plate or a pie dish.

  2. Make sure that you use good glue so that the objects are fixated properly to each other and don't fall apart.
  3. Take a spray paint—colour can be of your choice. You can keep it plain black, blue, or white if you want a monochromatic look, or go for multiple colors for a more colourful outlook.
  4. Spray the first coat of paint upside down. As you leave it to dry, take another stand and repeat the same step of attaching it to a pie dish.

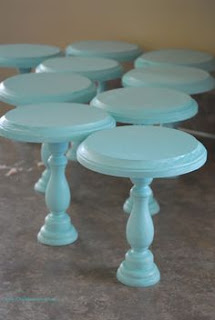
  5. You will need altogether three coats of spray paint, neatly done, for a clean finish and shiny appearance.
  6. Once that’s done, you have your all new cake stand, completely made by you!


Connect with us

If you too have some amazing ideas for decorating confectionaries or making stands for cupcakes, cakes and other food items, don’t forget to share it with us. We would love to hear you! Connect with us on Facebook or simply leave your comments below.

Friday 21 August 2015

DIY—Colourful dotted tumblers

Colours add meaning to life. It is an undeniable fact that colours always grab your attention and make you appreciate the beauty of them, regardless of how old you are. Now when it comes to getting creative, you can do wonders with some colours.

In this week’s release, we tell you how to make some beautiful, colourful dotted glass tumblers that you can use not just as a decorative piece of art in your own house but also gift it to your near and dear ones.

Things you will need:
-Enamel acrylic paint—red, blue, green, white, yellow.

-Two/ Three glass tumblers

-Cotton swabs

-Paper towel

-A parchment paper

-A sheet pan

Steps to make colourful dotted tumblers:

1.       Arrange all your items in one place, and choose the colours of acrylic paint that you want to use in your tumblers


2.       Take a sheet of paper towel and fold it evenly into half. Pull out dollops of each colour from the acrylic paint containers on the paper towel.


3.       It is up to your creativity when it comes to mixing colours. You can keep it simple or try experimenting, additionally, adding white to them to get some more new colours that you would like on your tumbler.

4.     Take a sheet of parchment paper and place it properly on the sheet pan.  Now flip your glass tumblers upside down on the pan, and dip your cotton swab into the colours and start dotting the tumblers. This will be your first layer of dots. As you are done with one tumbler, keep it aside to let it dry while you continue working the same way on the other tumblers. 


5.       After you are done with the first layer of dots and it is dry, start with the second layer, experimenting with your desired colour combinations. Be careful to dot from the base to the sides of the tumbler, and avoid getting closer to the edges.


6.      As soon as you are done with the double layering and you are sure that the paint has dried up, insert the pan inside a cold oven and bake your creation at a temperature approximately at 350 degrees Fahrenheit, for around 20-30 minutes in order to set the paint.


7.      Once you are done with the baking, let it cool down for a while before you flip them. And there you have it! Your own DIY colourful dotted glass tumblers. Gift them to your friends or keep them as a show piece.

Connect with us:

If colours are a part of your DIY projects as well, then we would love to see some of your creations. Connect with us on Facebook, or leave your comments below. We are always pleased to read them!

-
Images source: popsugar


Friday 7 August 2015

B&D DIY: Insulated Plastic Cup

A barbeque party, office tea or a glass of wine, drinks are more enjoyable when you can sip them at the temperature you want, cold or warm. Thanks to the wide world of DIY, getting creative and make an insulated cup yourself is easier than ever. This imaginative innovation will help keep your drink the temperature you want for longer.

Here’s what you will need:

- One paper towel
- Two plastic cups

Yes, that’s all you would need!

Here’s what you need to do:

-Firstly, get all the materials you need in front of you so that when you start work, you can finish it without moving to and fro.


-Now, take one large sheet of paper towel, fold it in half length wise.
 

-After that, wrap the folded paper towel around one of the plastic cups. Make sure it’s tight and snug.


-Now insert the paper towel wrapped cup carefully into the other plastic cup. 


-That’s it. You are done. Wasn’t that easy?

You can test it for yourself and see your drinks will not only retain their temperature in these insulated cups, but also prevent any condensation of water droplets outside of your cup.

Connect with us

For more interesting DIY tips and tricks, follow us on Facebook. Also, if you found this helpful, share this with your friends and family. Happy DIY’ing

[Images Courtesy : Instructables.com]